How to Take 10 Astrophotography Photos takes center stage, inviting readers into a world of capturing the cosmic beauty with precision and skill.
Exploring the basics, camera settings, planning tips, capturing techniques, and post-processing secrets, this guide ensures you master the art of astrophotography.
Understanding Astrophotography: How To Take 10 Astrophotography Photos
Astrophotography is the art of capturing images of celestial objects such as stars, planets, and galaxies using a camera and telescope. It allows us to explore the beauty of the night sky and observe objects that are not visible to the naked eye.
Equipment Needed for Astrophotography
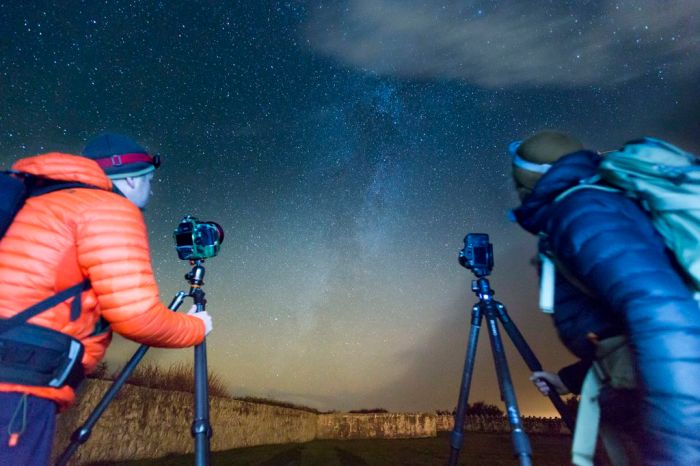
When engaging in astrophotography, it is essential to have the right equipment to capture clear and detailed images. Some of the key equipment needed includes:
- A DSLR camera or a dedicated astrophotography camera with manual settings for exposure and focus adjustment.
- A sturdy tripod to keep the camera steady during long exposure shots.
- A telescope with tracking capabilities to follow celestial objects as they move across the night sky.
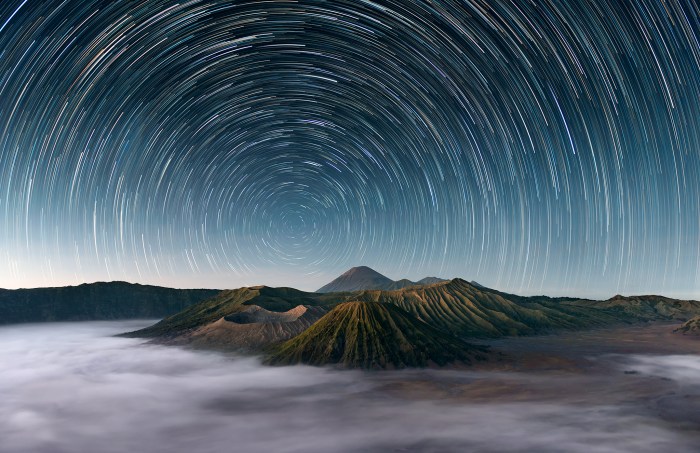
- An equatorial mount to compensate for the Earth’s rotation and prevent star trails in long exposure shots.
- Filters to enhance specific features of celestial objects and reduce light pollution.
Importance of Location and Timing
Choosing the right location and timing is crucial for capturing stunning astrophotography photos. Here are some key points to consider:
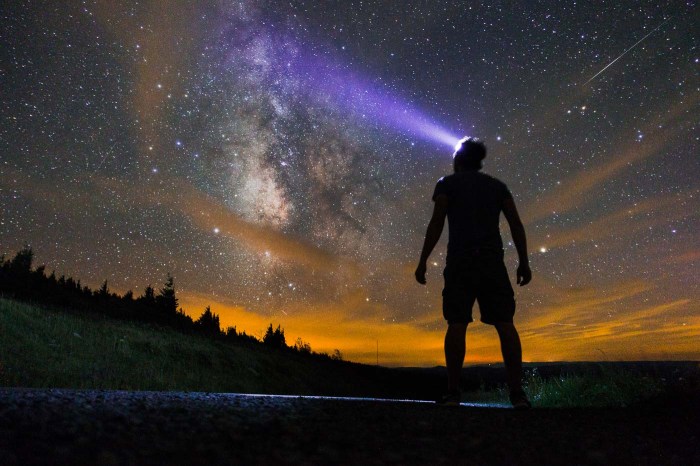
- Find a dark sky location away from city lights to minimize light pollution and improve visibility of celestial objects.
- Plan your shoot during a new moon phase when the night sky is darkest, allowing for better visibility of stars and galaxies.
- Consider the weather conditions to ensure clear skies and optimal viewing conditions for your astrophotography session.
- Research the best times of year to capture specific celestial objects based on their visibility in the night sky.
Camera Settings and Gear
When it comes to astrophotography, having the right camera settings and gear is crucial to capturing stunning images of the night sky. Here, we will discuss the ideal camera settings, types of lenses suitable for astrophotography, and tips for using tripods and remote shutters for stable shots.
Ideal Camera Settings, How to Take 10 Astrophotography Photos
- Set your camera to manual mode to have full control over settings.
- Use a wide aperture (low f-stop number) to let in more light.
- Adjust your ISO to a high value (usually between 800-3200) to capture more light in dark conditions.
- Set your shutter speed to a longer exposure time (usually between 15-30 seconds) to capture the faint light of stars.
- Consider using manual focus to ensure sharpness in your images.
Types of Camera Lenses
- Wide-angle lenses (around 14-24mm) are ideal for capturing expansive views of the night sky.
- Telephoto lenses (above 100mm) are great for close-up shots of celestial objects like the moon and planets.
- Prime lenses with wide apertures (f/2.8 or wider) are excellent for capturing detailed images of stars and galaxies.
Tips for Using Tripods and Remote Shutters
- Invest in a sturdy tripod to keep your camera stable during long exposures.
- Use a remote shutter release or set a timer to prevent camera shake when taking photos.
- Consider using a cable release for even more precise control over your camera’s shutter.
Planning the Shoot
When it comes to astrophotography, planning is crucial for a successful shoot. Researching locations, understanding weather conditions, and managing your gear are all important factors to consider.
Researching Locations
- Look for dark sky areas with minimal light pollution for clearer shots of the night sky.
- Check for any restrictions or permits needed for specific locations, such as national parks or private properties.
- Consider the composition of your shot and look for interesting foreground elements to complement the night sky.
Significance of Weather Conditions and Moon Phases
- Clear skies are ideal for astrophotography to capture sharp and crisp images of celestial objects.
- Avoid shooting during cloudy or hazy conditions as they can obscure the stars and planets in the sky.
- Check the moon phases and plan your shoot accordingly; a new moon phase is best for capturing the Milky Way and other faint objects.
Preparing for Long Exposure Shots and Battery Management
- Use a sturdy tripod to keep your camera stable during long exposure shots to avoid any blurriness in your images.
- Set your camera to Bulb mode for longer exposures and use a remote shutter release to prevent camera shake.
- Carry extra batteries and keep them warm in cold weather to prolong their life during a shoot, as long exposures can drain battery quickly.
Capturing the Photos
Capturing stunning astrophotography photos requires careful attention to focusing, framing, and enhancing details. Here’s how you can master the process.
Focusing on Stars and Galaxies
When focusing on stars and galaxies in astrophotography, it’s crucial to achieve sharpness and clarity in your images. Follow these steps to ensure precise focus:
- Use manual focus: Set your camera to manual focus mode to have full control over the focusing process.
- Use live view: Utilize the live view function on your camera to zoom in on a bright star or planet and adjust the focus manually until it appears sharp.
- Focus on infinity: Set your lens to focus at infinity to capture distant celestial objects with clarity.
Framing and Composing Astrophotography Shots
Before capturing your astrophotography images, it’s essential to frame and compose your shots effectively. Consider the following tips for creating visually appealing compositions:
- Find a focal point: Identify a prominent star, constellation, or celestial object to serve as the focal point of your composition.
- Experiment with angles: Explore different angles and perspectives to capture unique and engaging shots of the night sky.
- Include foreground elements: Incorporate elements like trees, mountains, or landmarks in your frame to add depth and context to your astrophotography images.
Reducing Noise and Enhancing Details
To produce high-quality astrophotography images with minimal noise and enhanced details, consider implementing the following techniques:
- Use lower ISO settings: Opt for lower ISO settings to reduce noise and maintain image quality in low-light conditions.
- Stack multiple exposures: Capture multiple exposures of the same scene and stack them using software to reduce noise and enhance details in your astrophotography images.
- Apply noise reduction tools: Utilize noise reduction tools in post-processing software to further reduce noise and improve the overall clarity of your astrophotography photos.
Post-Processing and Editing
Post-processing plays a crucial role in astrophotography as it allows photographers to enhance and bring out the details in their photos captured from the night sky. It helps in correcting any imperfections, adjusting colors, reducing noise, and highlighting the beauty of celestial objects.
Techniques for Editing Astrophotography Photos
- Adjusting contrast and brightness to make stars and galaxies stand out.
- Sharpening the image to bring out fine details in nebulae and planets.
- Reducing noise to create a cleaner and smoother image.
- Applying color correction to enhance the natural colors of the night sky.
- Creating a composite image by stacking multiple shots to improve overall quality.
Software Tools for Astrophotography Editing
There are several software tools commonly used by astrophotographers to edit their photos and bring out the best in their captures:
- Adobe Photoshop: A versatile tool for advanced editing, layering, and fine-tuning of astrophotography images.
- Lightroom: Ideal for organizing, cataloging, and making basic adjustments to astrophotography photos.
- DeepSkyStacker: Specifically designed for stacking multiple images to reduce noise and enhance details in deep-sky objects.
- Starry Landscape Stacker: Perfect for aligning and stacking landscape and sky images for stunning astrophotography results.
- PixInsight: A powerful software dedicated to astrophotography processing, offering a wide range of tools for in-depth editing.
Closing Summary
Mastering the art of astrophotography is a journey that unveils the wonders of the universe through your lens. With these tips and tricks, you’re ready to capture the stars and galaxies in all their glory.